Google Maps can be very useful for hiking planning. It can show you the path and directions. More importantly, what the altitude information is at the position.
First, let’s pick some hiking trips, and second, we will explain how to use the resulting data provided by Google Maps.
Create Google Maps Hiking (Route) Trip
1 – Go to Google Maps (opens in new tab)
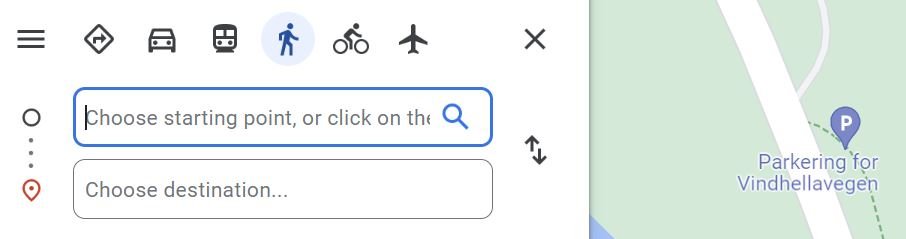
2 – Click the Directions icon next to the magnifying glass

3 – Choose the “Walking” icon on the top bar

4 – Find on the map location that will be starting point of your hike (for example, we have found the Vindhellavegen parking lot)
5 – Pick a starting point (left-click mouse) for your hiking trip or type in the Search Google Maps box. This point will be added to the list on the left-hand side and shown as a dot on the map (notice red arrow below)

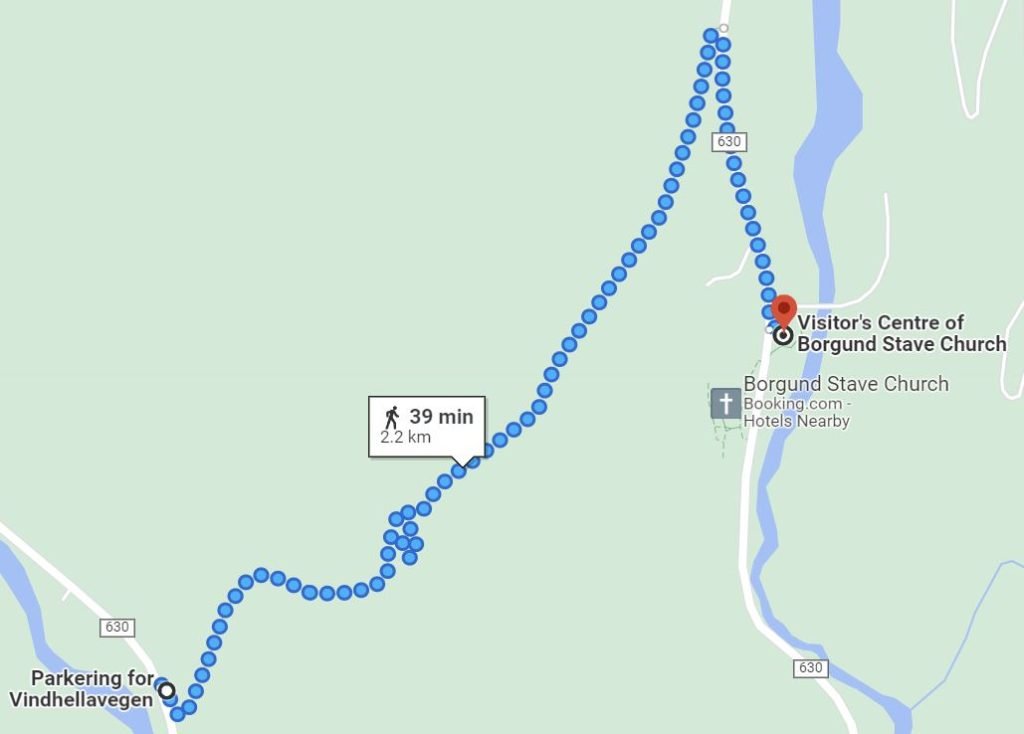
6 – Find on the map destination (for example, we found the Visitor’s Center of Borgund Stave Church)

7 – Pick the destination point (left-click mouse). The destination is added on the left-hand side as you can see in the screenshot below. Optionally, we can add more points by clicking the plus (+) icon and selecting new points. For the sake of example simplicity. we will just use two points.

8 – We got the result that we will explain in a minute.

9 – We can change Route options by clicking on the Options button. Here we have the option to avoid ferries or change distance units.

Now we can explain the results and how to use them for hiking (route) planning.
Understand Google Maps Hiking (Route) Result
We can look at the result on the map first and later the result on the left-hand side infographics.
First, notice that on the map our hiking track has small dots and we can see on the label the distance and walking time (39 minutes and 2.2 km) for our hiking trip. We can hover over each blue dot and see on the left-hand side altitude profile where that dot is regarding the altitude.
On the left-hand side, we have several sections:
- On the top bar, we have several icons to change route type results (car, public transport, walking, bicycle, flight)
- The next section shows us starting point and destination. We can add more points as well by pressing the plus icon (+).
- Below that is the Options button that we have already explained
- Below the Options section, we have the possibility to send directions to our phone.
- The next section gives us important information about the distance and time for a hiking trip (route). In addition, if we click on the Details link it will reveal a more detailed description of our hiking (we will see the details info in a minute).
- The final section gives us so to speak altitude profile for our hike (route). We will explain it in the next screenshot.
Hike (Route) Altitude Profile
Let’s explain the data shown in the screenshot below.
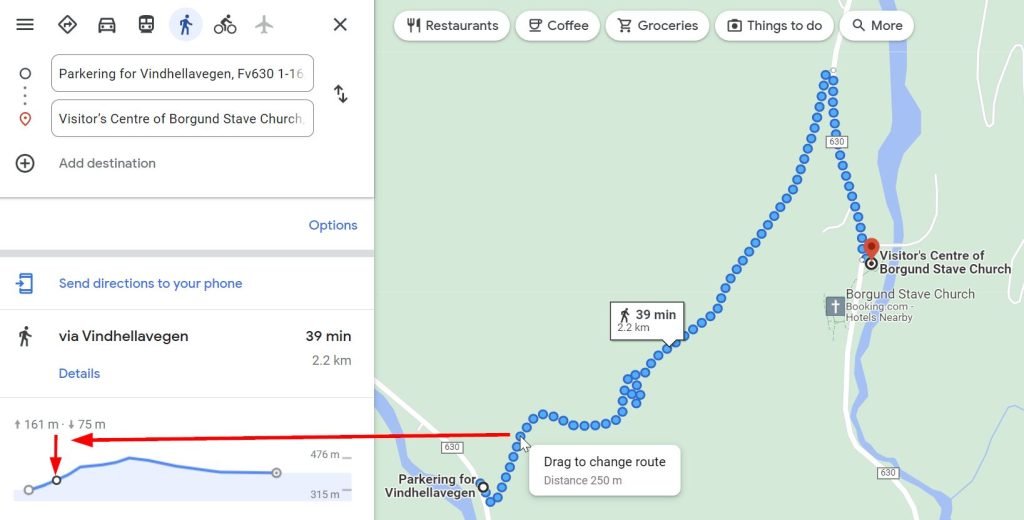
- On the right-hand side are two altitude numbers
- The bottom number (315m) is starting point altitude
- The top number (476m) is the peak (the highest altitude on our hike)
- Two dots on the blue graph represent starting point and destination respectively.
- The blue line is so to speak altitude profile of our hike (route). We will explain shortly where is each altitude on the map (blue dots on the map).
- The top numbers represent ascending and descending respectively.
- the left number with the arrow point up (161 m) represents ascending. The altitude difference between the highest and lowest point on the way up.
- the right number with the arrow point down (75 m) represents. The altitude difference between the highest and lowest point on the way down.
Just by looking at the altitude profile (blue line), we can conclude that hiking up is steeper than hiking down. So we can prepare ourselves for such a profile accordingly.

If we hover over blue dots on the map (look at the screenshot below), we can see where that point is on the altitude profile on the left (red arrows). So we can quickly hover over hiking blue dots to scan the altitude profile.
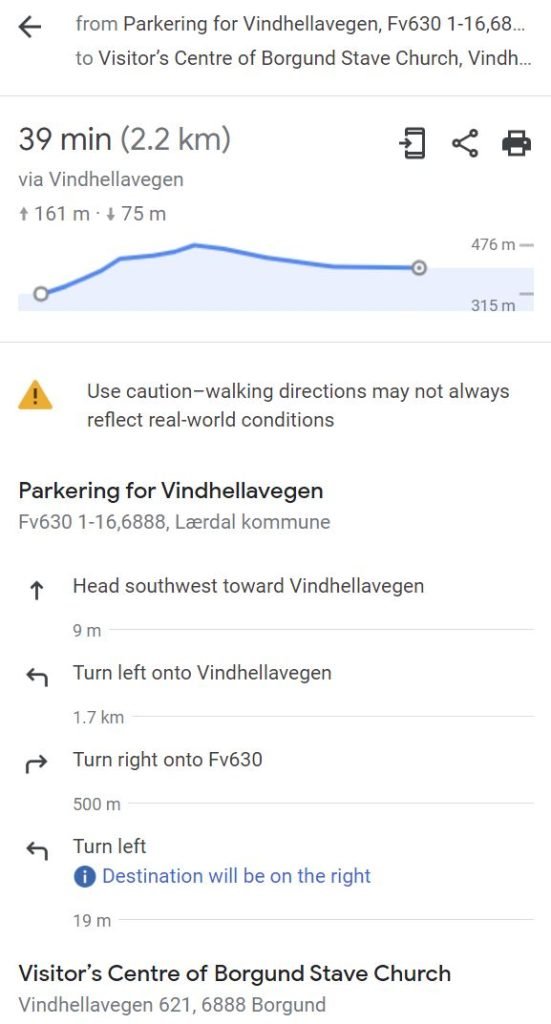
Finally, if we click on the Details button we get more details data about the route. The details data is also divided into several sections.
- The top section allows us to return back to the previous infographics screen.
- The next section gives us valuable data about hiking and the possibility to send data to the phone, sharing data, or to print data.
- The bottom section gives us the walking direction instructions (head, turn left, turn right, etc.) and the walking distance (m or km) of each instruction.
Google Maps Hiking Planning – Nuances
Unfortunately, we cannot use this feature for all the tracks in the world just those which are obvious to Google Maps.
For example, when we planned our Experience Raksætra & Oppheimssætra Hiking – Summer Pasture Farms, we could not find a suitable hiking track on Google Maps.

However, Google Maps was extremely useful while planning Vindhella Winding Road and Renndølsetra Hiking for our road trip in Norway.
We wish you an epic trip!